After the installation we have to configure our application and to learn how to use borg-ui. We will create a repository, select which folders to backup and create a schedule to perform them every night.
Initial setup
Create backup repository
Open Borg UI in your web browser at http://localhost:8081 from the server itself or http://<machine-ip-address>:8081 from another device on your network (laptop, mobile). Check here how to view your ip address if you do not know it.
If you are running Borg UI inside a virtual machine, make sure the VM uses Bridged networking instead of NAT so other local devices can reach it.
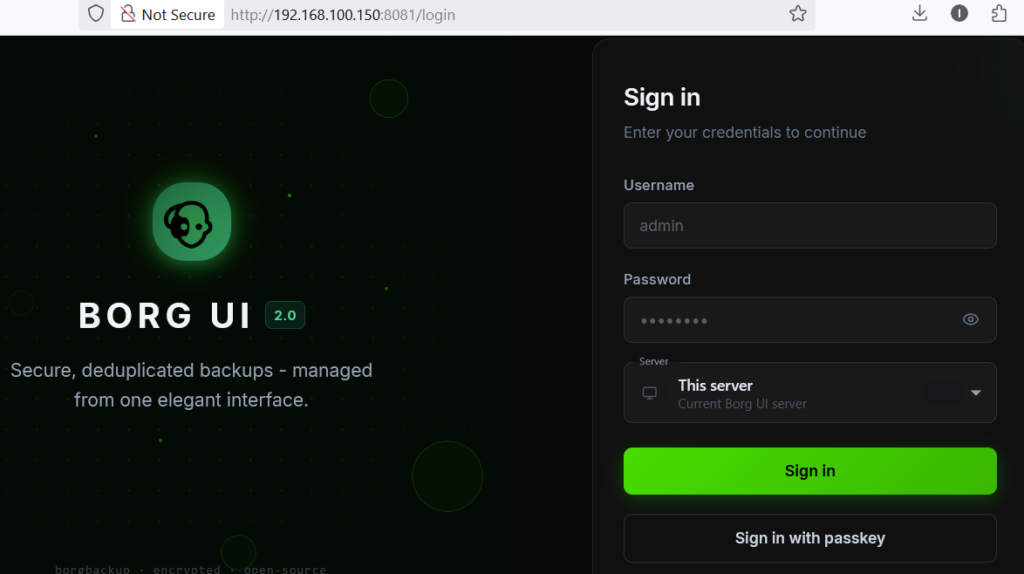
Now sign in with the default credentials User: admin, Password: admin123 and you will be presented with a screen to change your password.
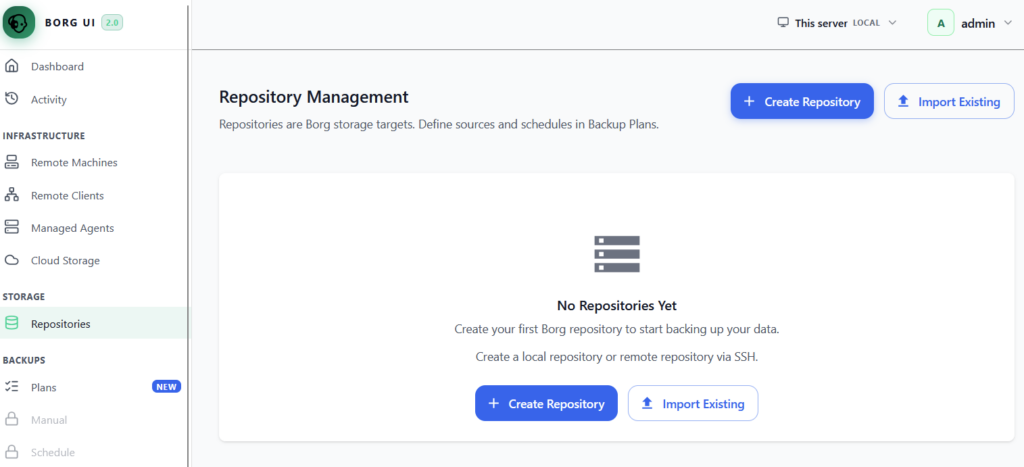
The first thing we need to do is to create a repository, which is the the target folder where we want the encrypted backups to be stored
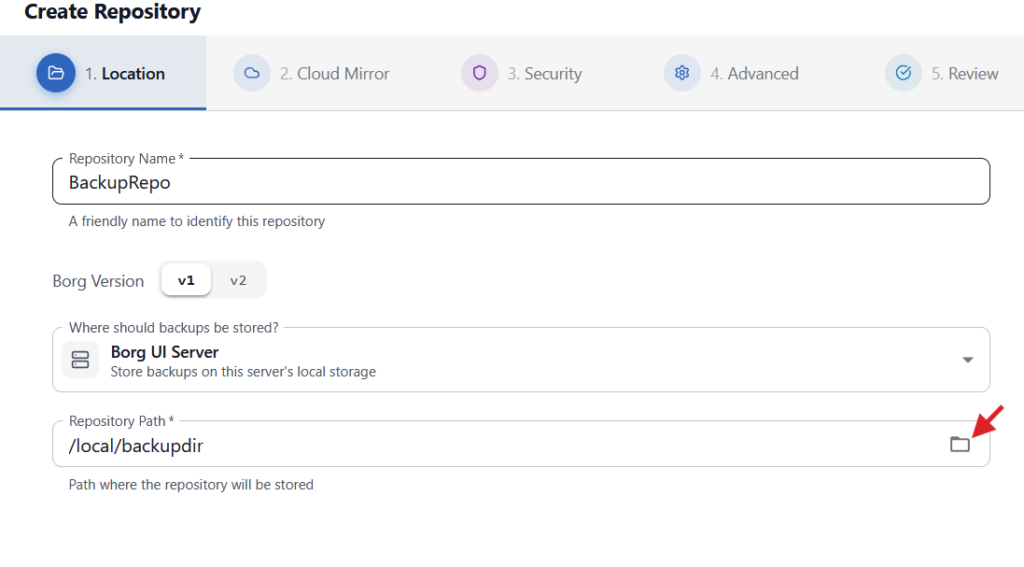
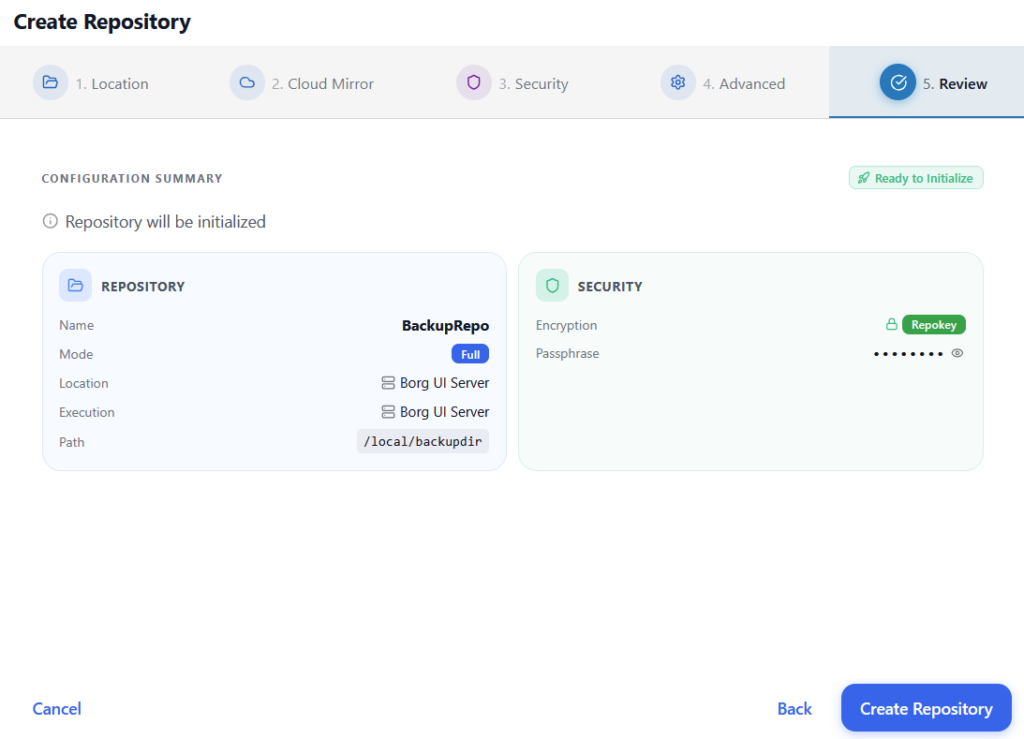
Enter a name and select the backup folder that we created and mapped in the docker-compose.yml during installation /local/backupdir
In the docker-compose.yml we have this line /media/backup/borgui:/local/backupdir:rw, which means we are mapping /media/backup/borgui from the host system to /local/backupdir in the docker container. This is why we use /local/backupdir in borg-ui
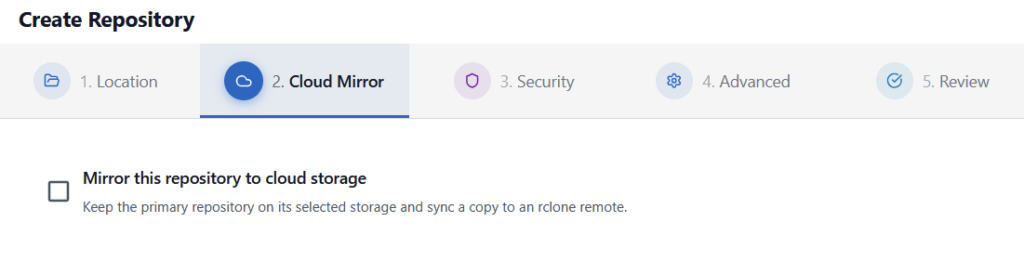
We do not have a Cloud Mirror and this is also a Paid feature, not part of the community edition , so we skip that part and leave it unchecked. The idea is that you can clone your backups also to a third party cloud storage in AWS / Azure / Dropbox / Google Drive or other supported option
On the next page we configure a Repository key, which will be used to encrypt our backups and it is important to remember it, as otherwise your backups might become unusable
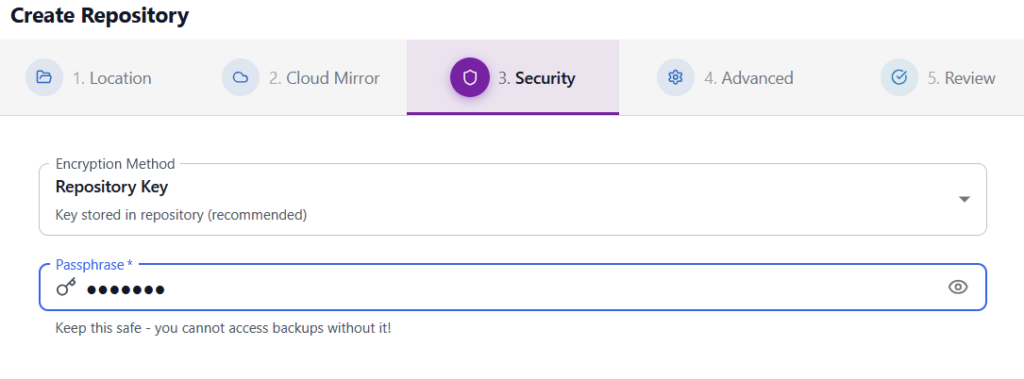
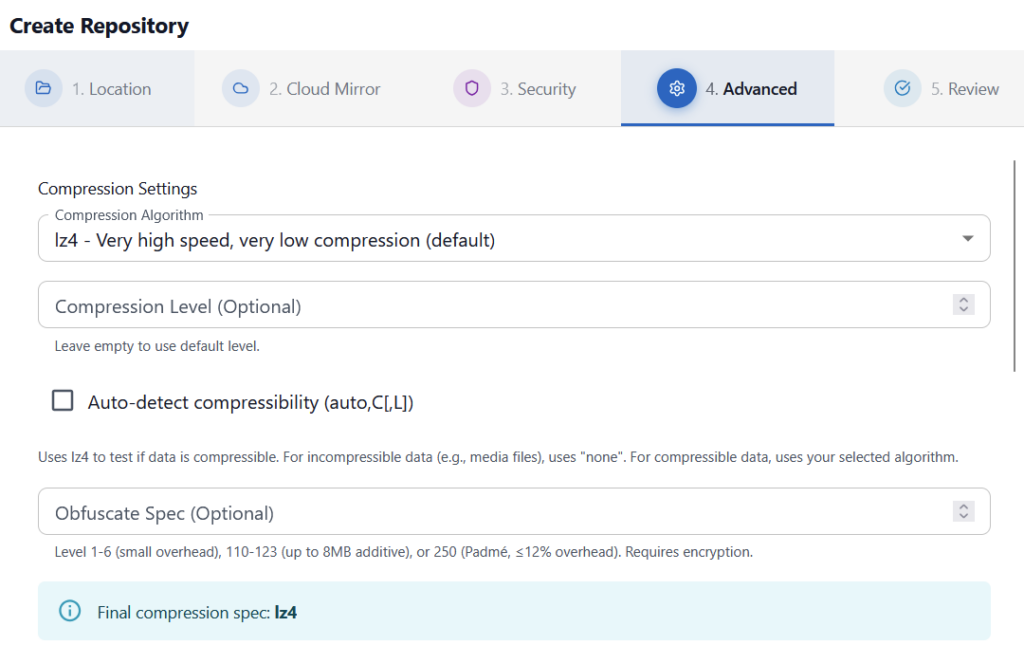
On the Advanced tab we leave everything as it is and continue
We review and confirm the settings to create the backup repository
You might receive such error message at this stage: Parent directory is not writable. Please ensure the directory exists with correct permissions.
Fix: Check in your docker-compose.yml file that the following environment variables exists
environment:
- TZ=Europe/Sofia # Set your timezone
- PUID=0
- PGID=0 
Create backup plan
After the repository is created successfully, it will automatically show the backup plan wizard. Enter a name and select backup sources
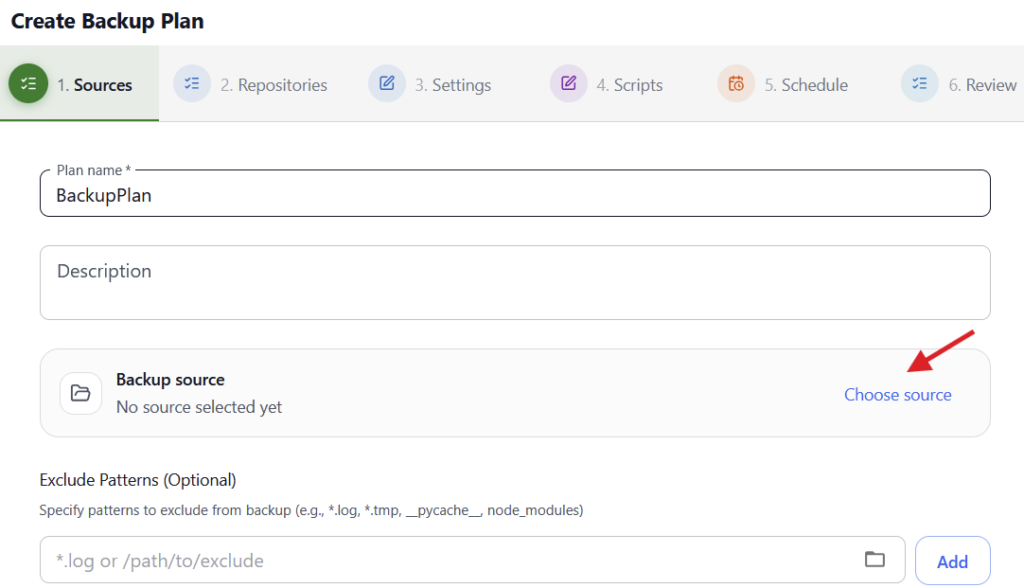
In my case i would like to backup my immich library with my photos. As we mounted our whole /opt folder to /local/data in borg-ui, we have access to all our other docker folders and their data, so that we can start backing them up
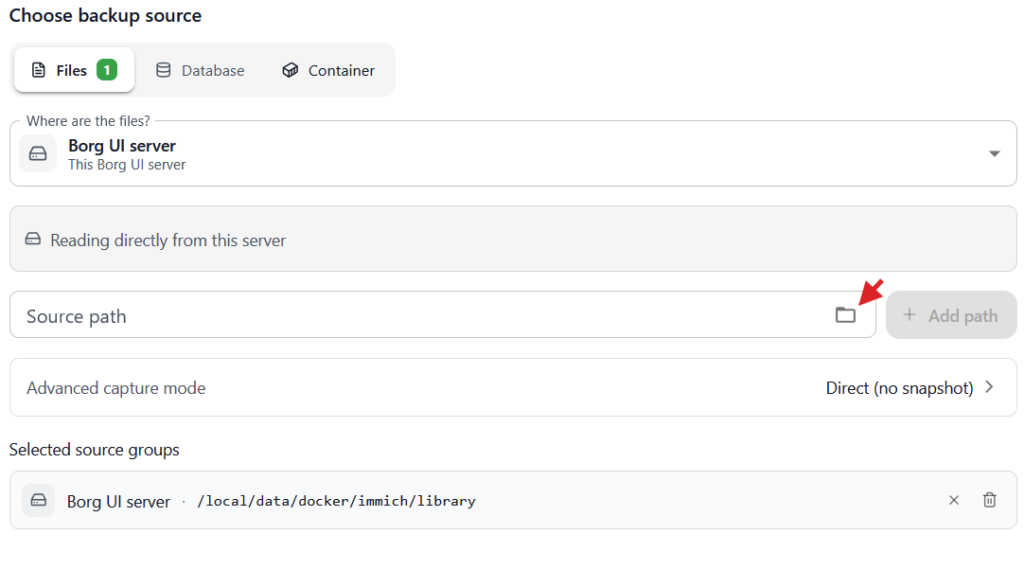
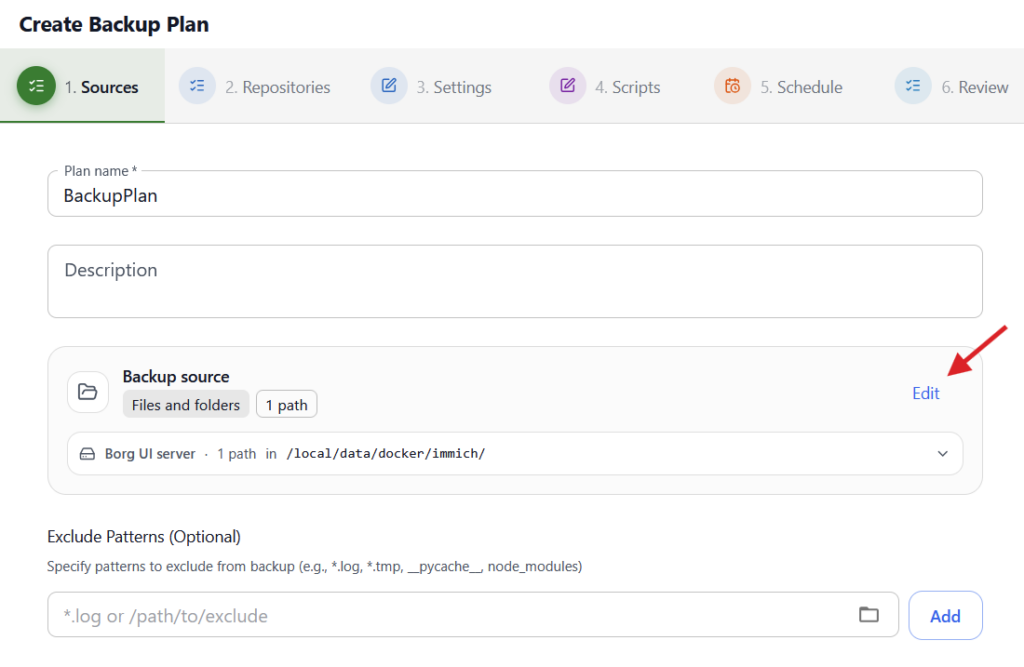
You can change your selection or add more paths later. There is also an option to exclude files or folders from backup with Exclude Pattern
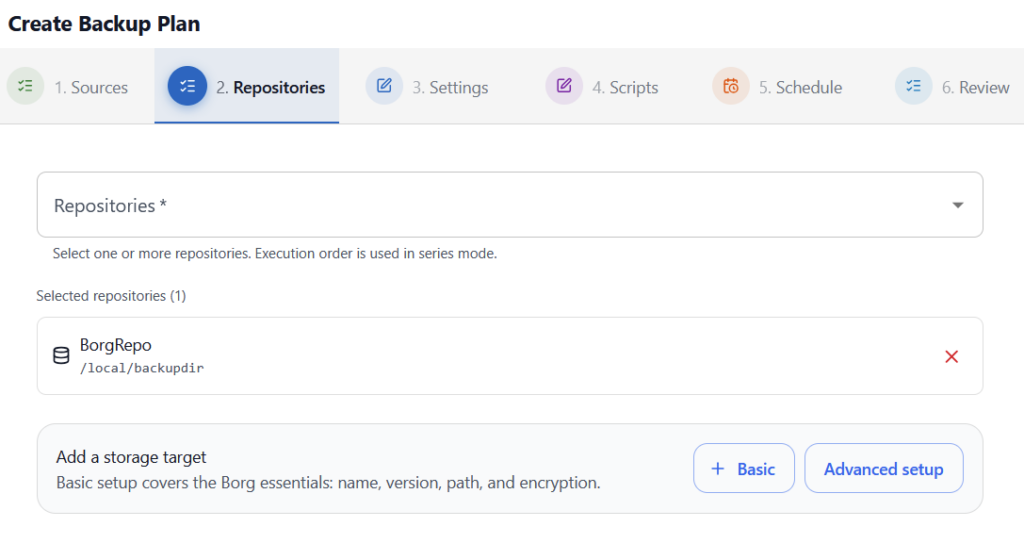
We select the storage repository that we created on the initial step as target (it should be selected by default, as it is the only one)
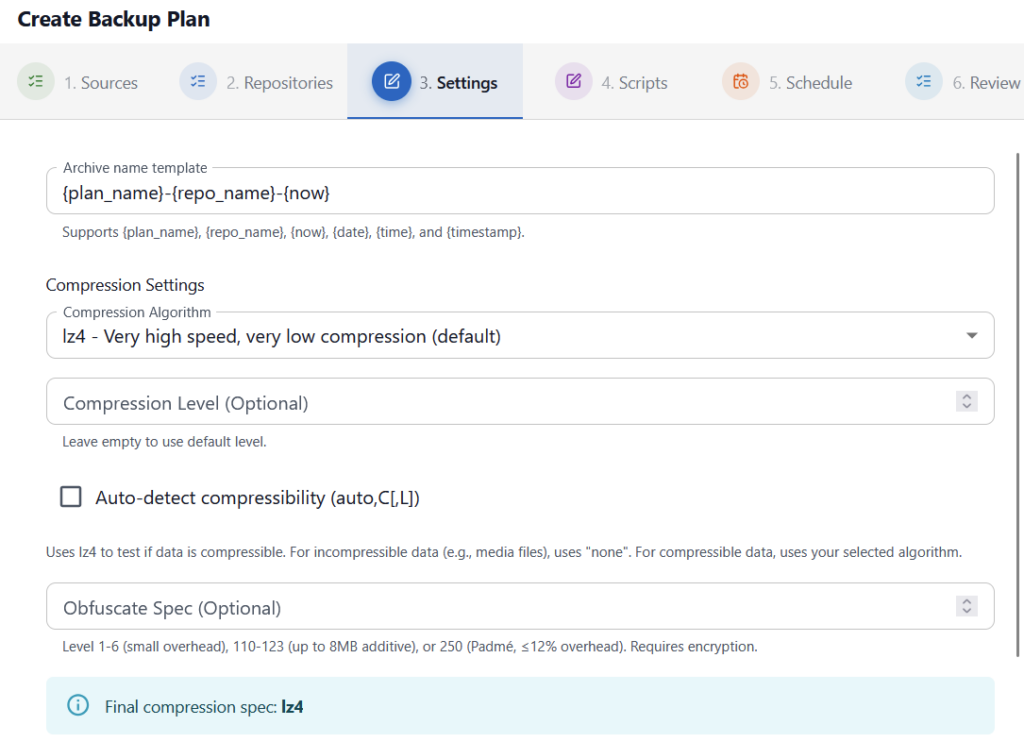
We leave Settings and Scripts tab as they are by default
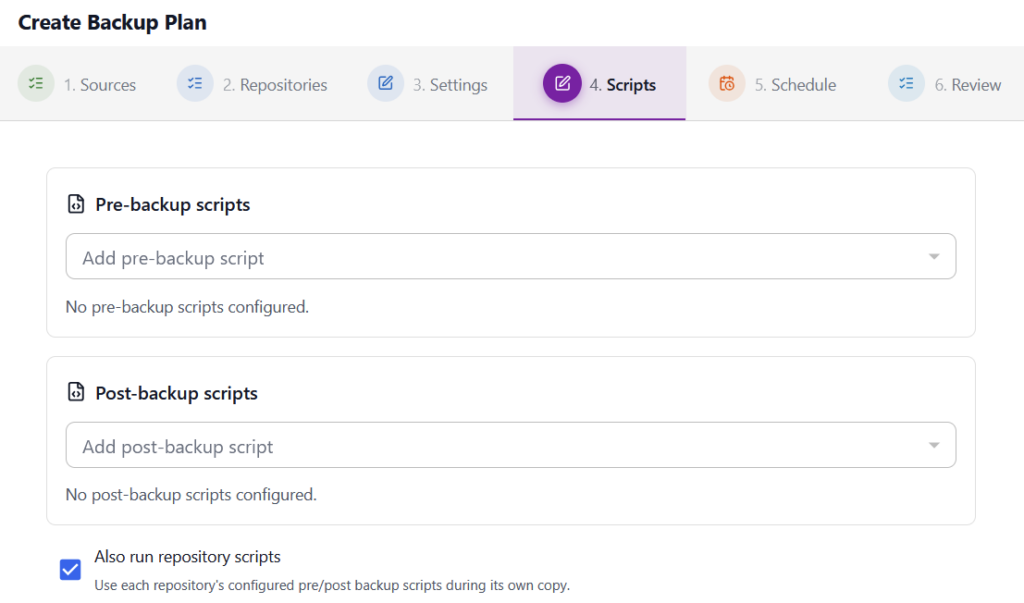
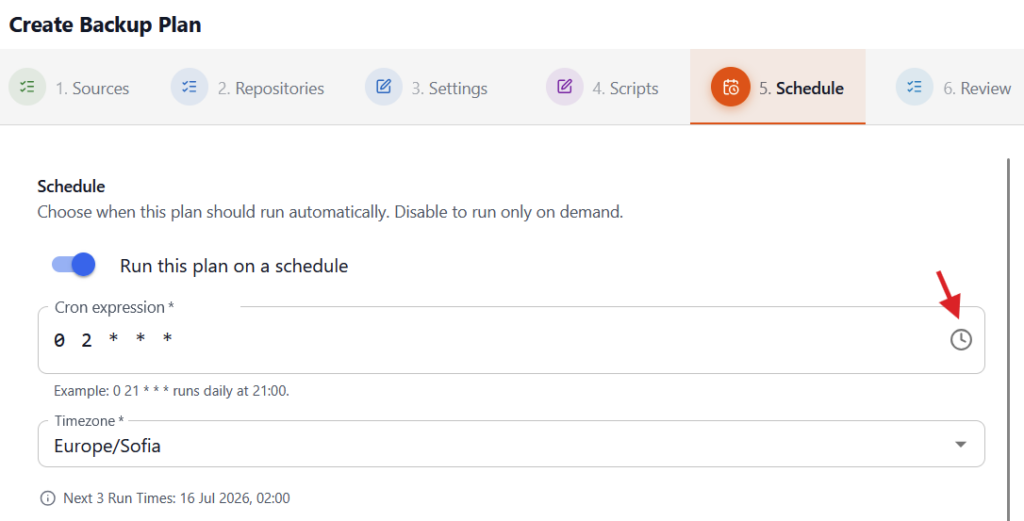
On the Schedule tab is the important part, where we actually configure when and what should be done. Let’s say we want a daily backup of our selected folders to happen at 2:00 AM.
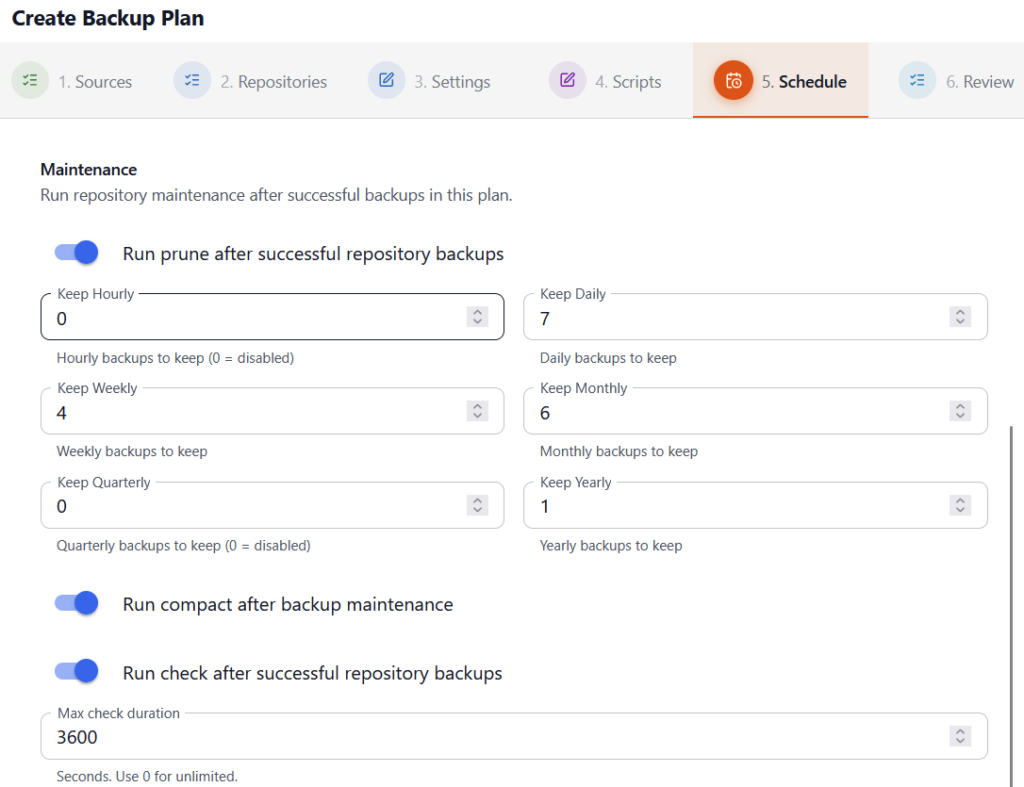
We also want to keep a specific amount of backups and borg-ui should automatically delete older or unnecessary ones. This is called Prune and can be configured as part of the maintenance. It is also mandatory to use compact as a maintenance task to free up physical disk space after archives are pruned. We also want to check the repository, after the backup has been completed
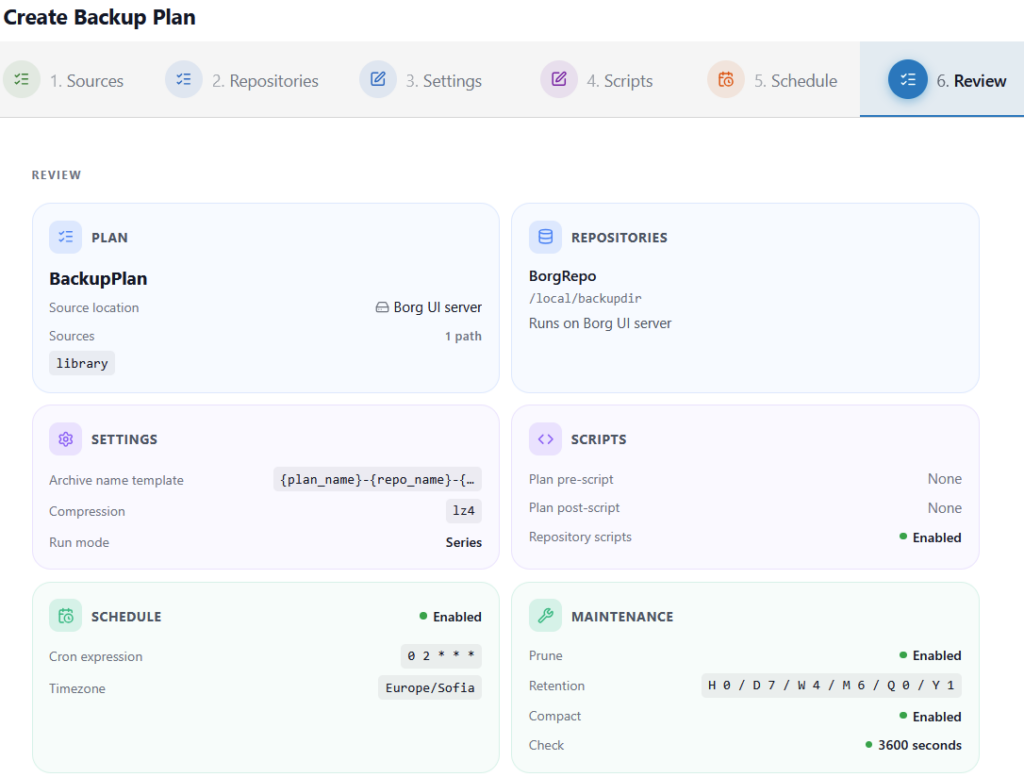
We review and confirm our configurations
You can now run the backup task manually or wait for the schedule to trigger it.
Monitoring backup activity
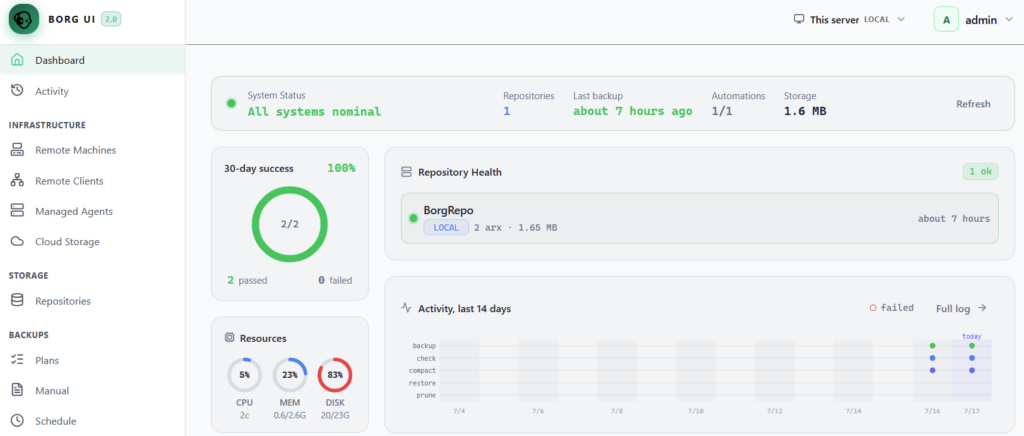
After your first backup completes, you can monitor the activities status in the Dashboard
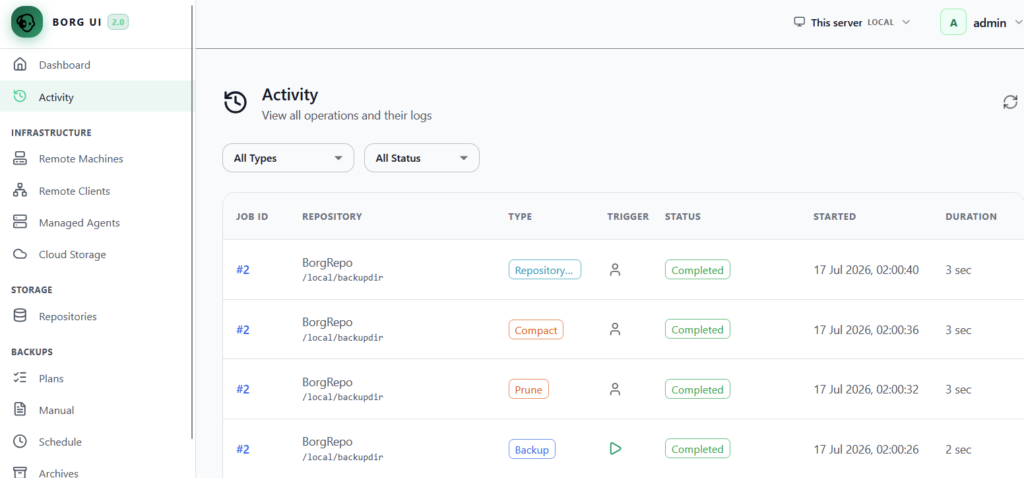
More details are displayed in the Activity tab
Browsing and restoring from a backup
Browsing
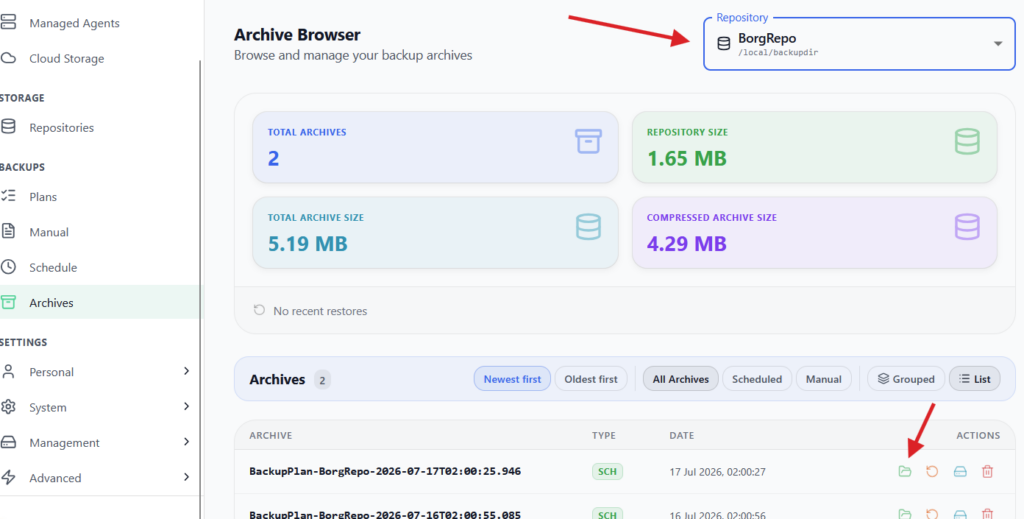
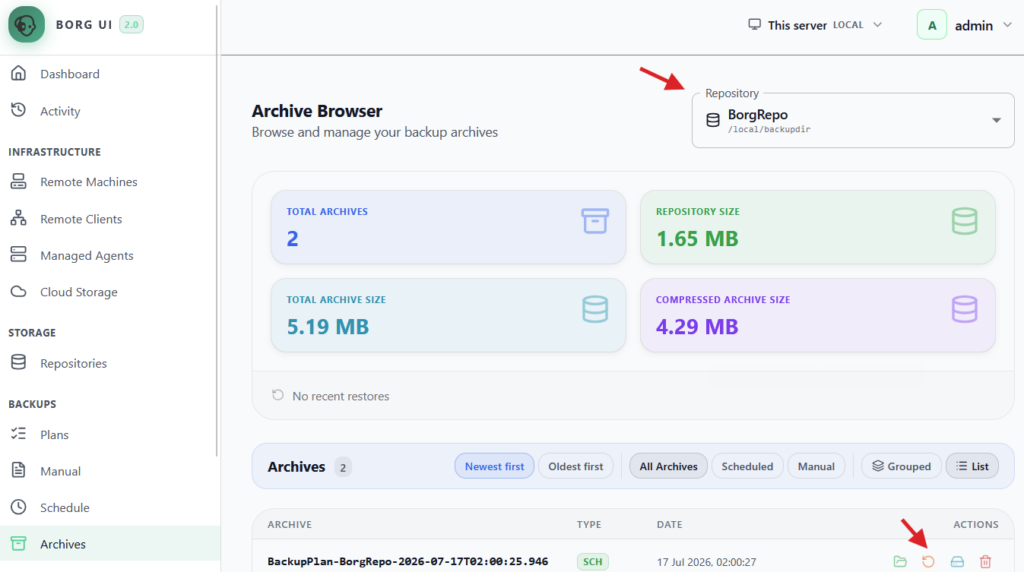
To browse what does a specific backup includes go to Archives tab, select a repository (it should be only one) and click on the browse folder icon
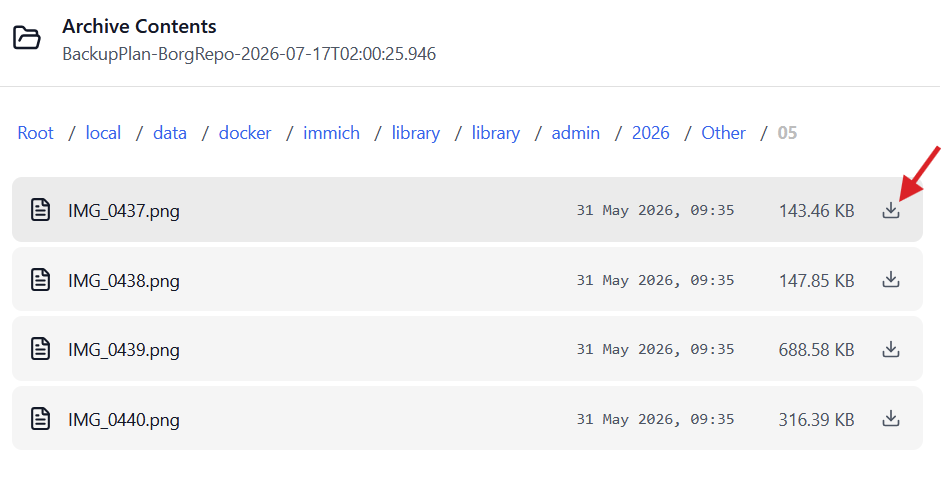
This will display a folder like structure of the contents of the backup like this and you could browse inside.
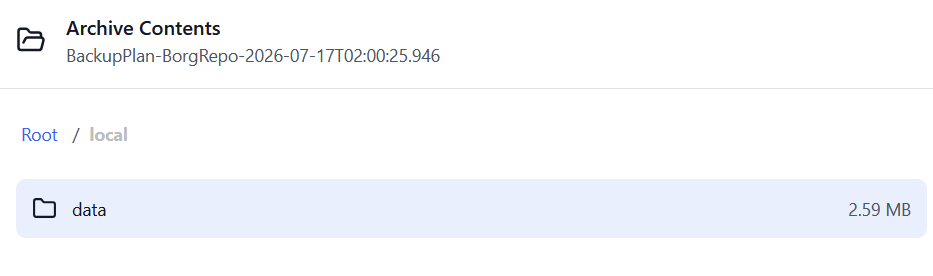
You could also download specific files, if you want using the download icon next to the files
Restoring
Before initiating a restore make sure you have stopped the service / docker / db or anything else that might be using those files, which you would like to restore to avoid corrupting the applications.
To restore a backup, you do it again from Archives tab, but this time select the restore icon
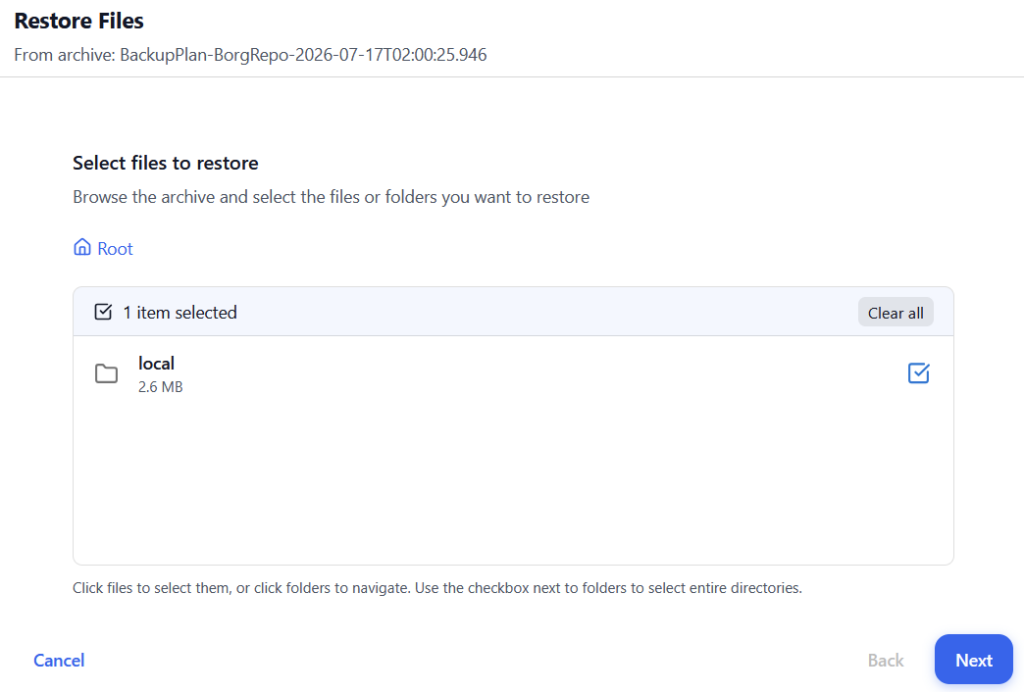
Select which folder / item you want to restore
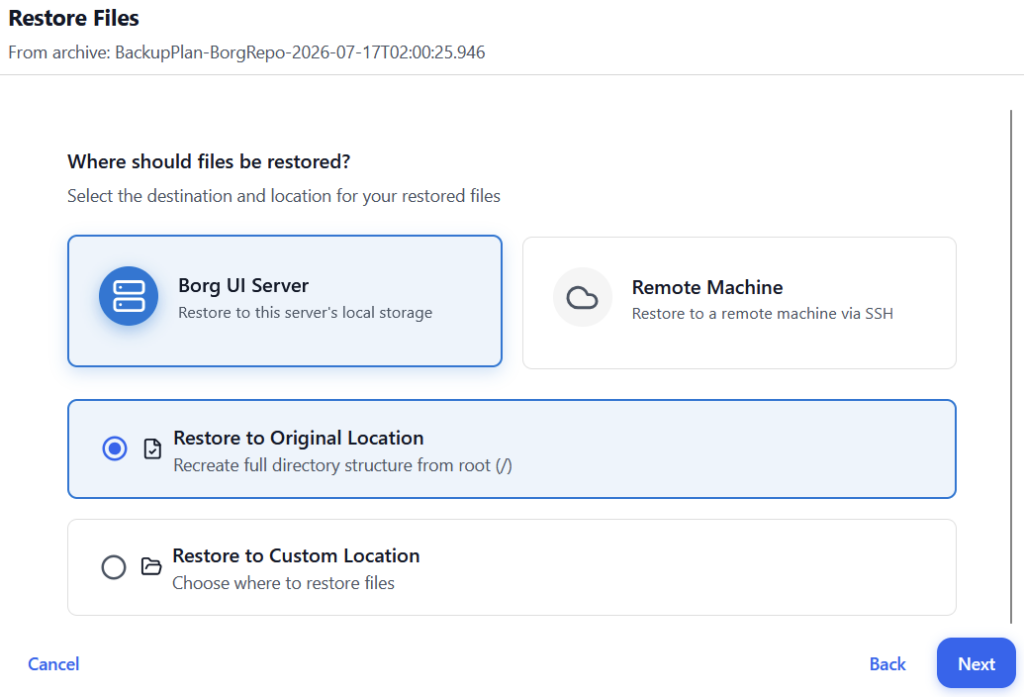
Choose if you want to restore it to the original location or another one and confirm
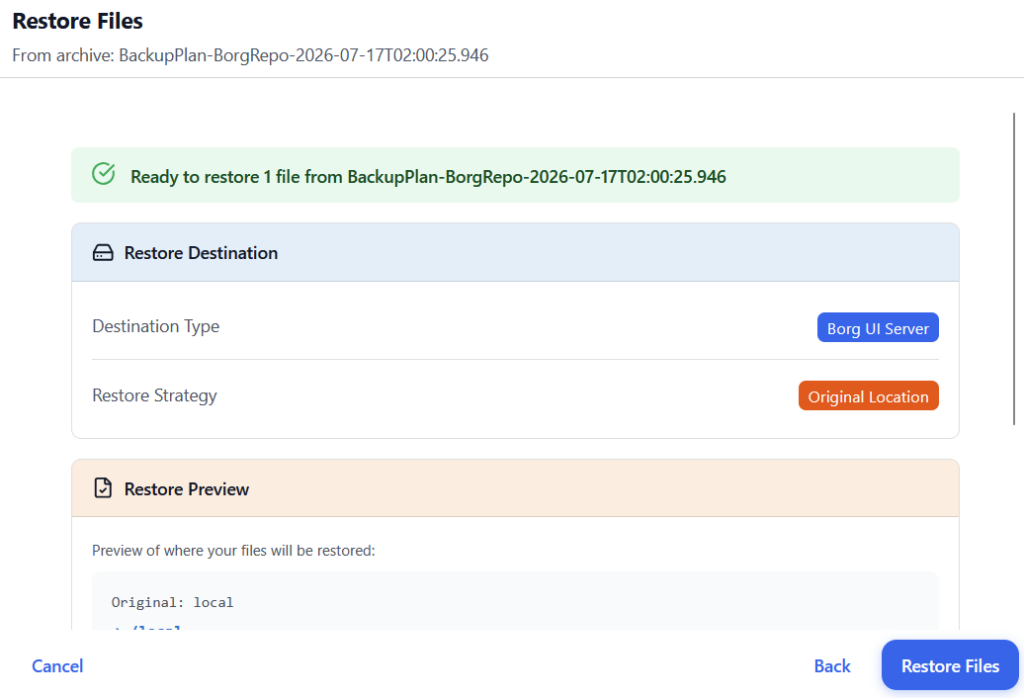
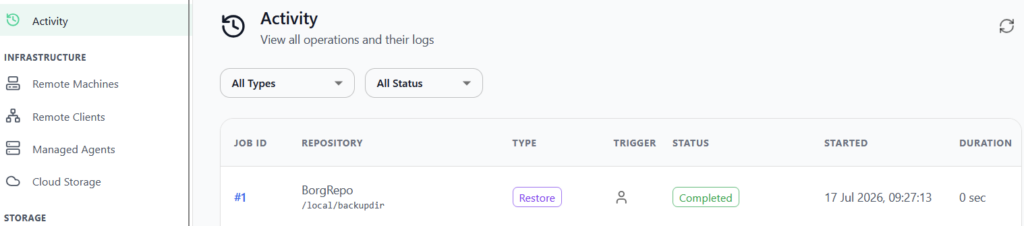
You can see information of the Restore in the activity bar as well
Advanced functionality
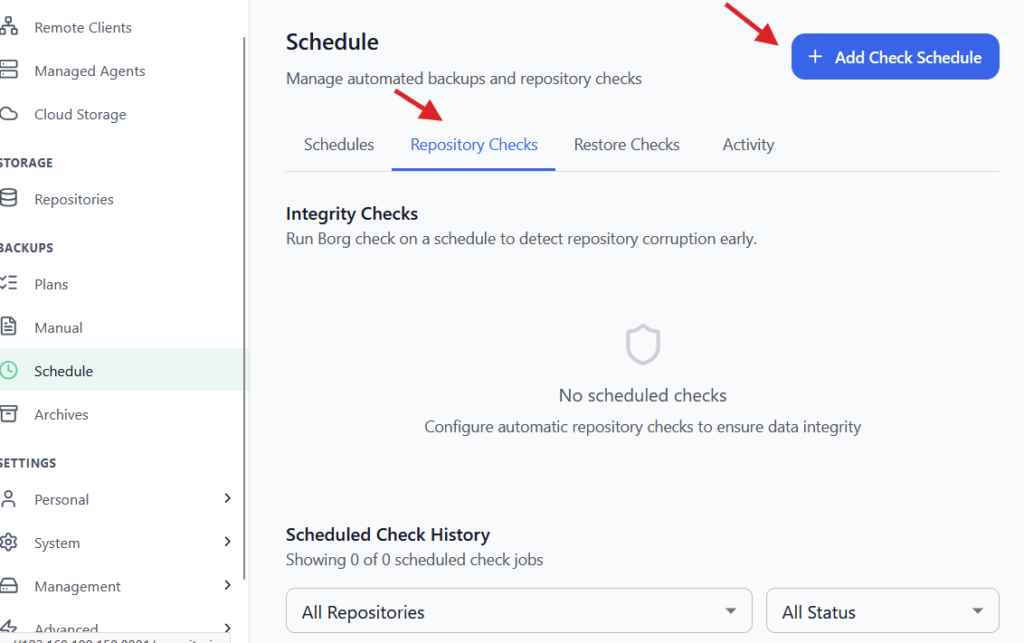
Repository check schedule
There are a couple of extra features that might be interesting for you. One of those is the Repository Check Schedule. The main idea is that you could have independent scheduled check of the repository and not after every backup (if you enabled it in the backup plan). For example:
- Backup schedule every day with Compact and Prune
- Repository check schedule every Monday
Restore check schedule
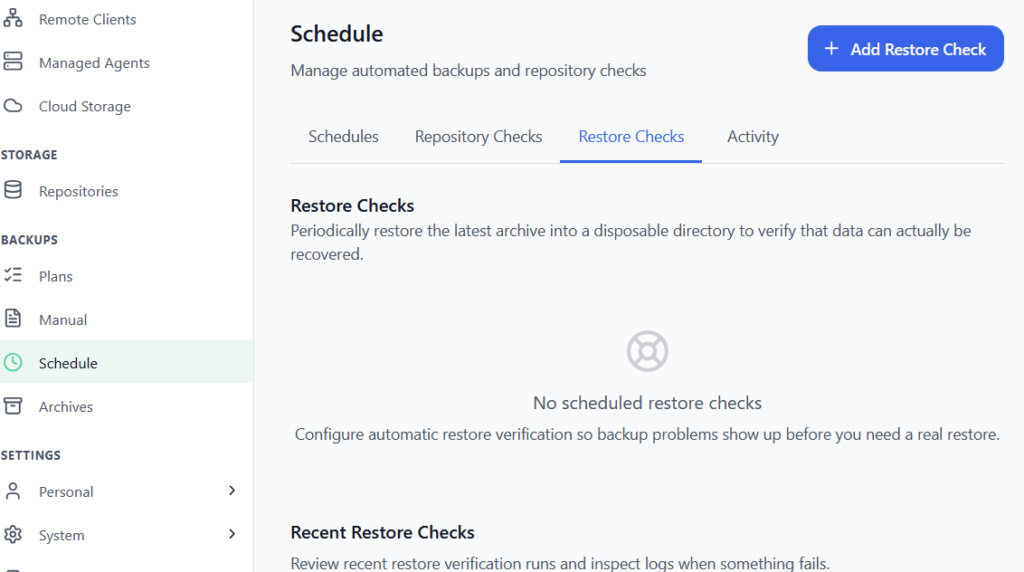
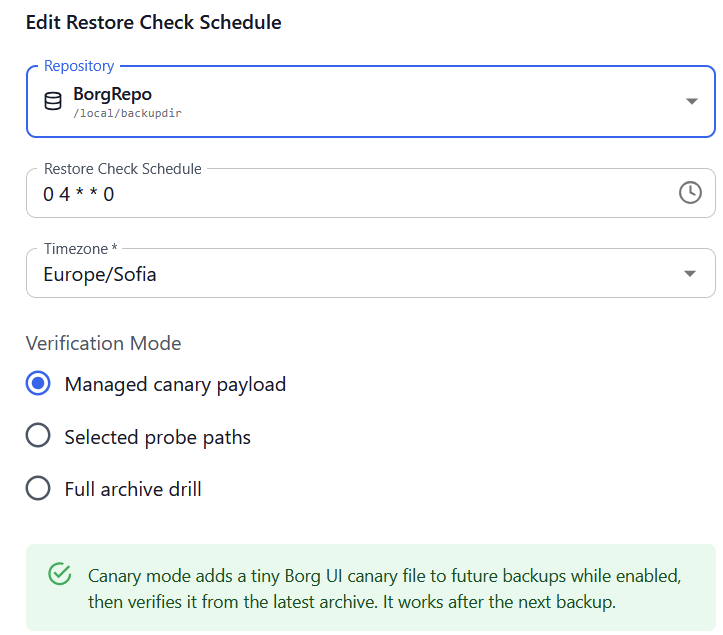
Similar to this, there is also a Restore Check, which goes even further than checking if repository integrity looks correct. It can actually restore periodically the latest backup in a separate directory and check a specific file in it. There are multiple options for what file will be checked after a restore to confirm it works
Notifications for failed backups
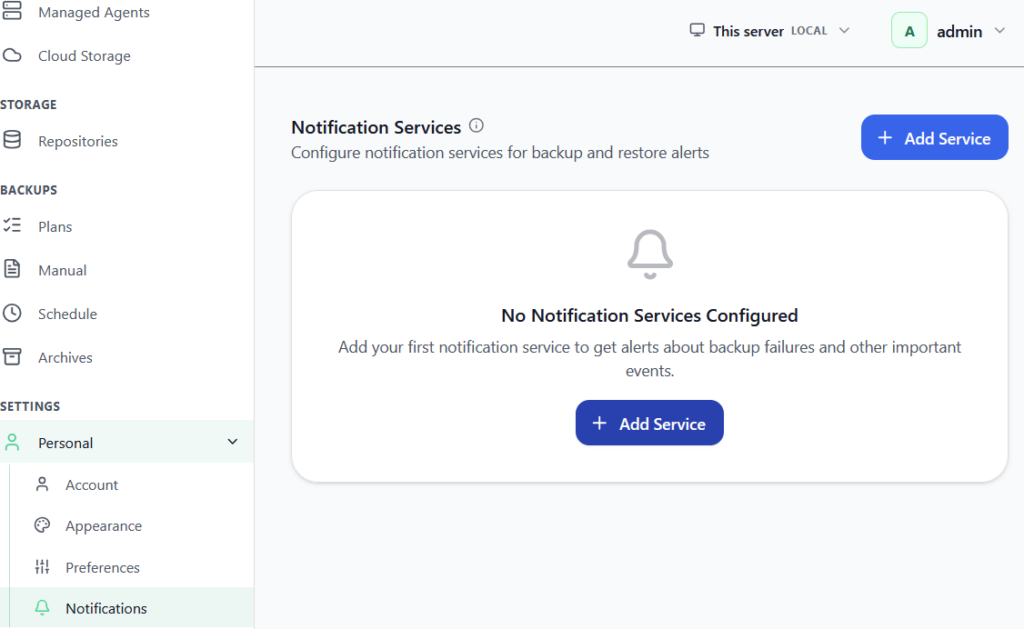
You could setup notifications to receive them on certain events, but it requires additional infrastructure, which in a home lab you most probably don’t have. I will cover in a future article a possible mail notification service integration from a cloud provider with a free tier, which should be more than enough for a home lab.
Conclusion
Borg UI simplifies backup management by combining the power of BorgBackup with an intuitive web interface. With support for encrypted, deduplicated, and incremental backups, it provides an efficient and reliable way to protect your data while reducing storage usage.
Whether you’re managing a home lab or a production environment, Borg UI helps make backup and restore operations straightforward, ensuring your critical data remains safe and recoverable when you need it most.