Borg UI is a modern open source web interface with free community edition for Borg Backup that lets you protect your data files with encrypted, incremental, de-duplicating backups without having to remember complex command-line syntax. Let me explain what this mean:
- encrypted – files are protected during backup and kept encrypted. You will need the key / passphrase to see the contents so the data on the drive is protected
- incremental – every subsequent backup only captures the the specific changes made since the immediately preceding backup. This allows doing regular backups on daily or even hourly basis. Only the initial full backup will take a lot of time
- de-duplicating – saves space by finding and removing redundant data. Instead of keeping multiple copies of identical files or data chunks, the system stores only one unique instance and replaces the rest with lightweight pointers referencing that original
Think of it as your own backup management portal. In this guide, I’ll walk you through getting it running with Docker Compose (read the Prerequisites article for instructions on how to install Docker and Docker Compose), configuring the required folders, and launching your first backup management interface.
Borg UI allows you to create repositories, run backups, browse archives, restore files, manage schedules, and monitor backup operations from a single web dashboard. Official documentation can be found here: https://docs.borgui.com/
Installation
I keep all my Docker configurations and data in /opt/docker, so let’s prepare the folder structure. Open a Terminal and copy the instructions.
# Navigate to /opt
cd /opt

# Create folder docker (if not already existing) and navigate to it
sudo mkdir docker
cd docker

# Create folder for Borg UI and navigate to it
sudo mkdir borg-ui
cd borg-ui

# Create docker-compose.yml configuration file and open for edit
sudo vi docker-compose.yml
Now you need to paste the contents into the docker-compose.yml.
Don’t forget to press i (for insert) and paste the contents into the file with Right Click or Shift + Right Click.
services:
  borg-ui:
    image: ainullcode/borg-ui:latest
    container_name: borg-web-ui
    restart: unless-stopped
    ports:
      - "8081:8081"
    volumes:
      - borg_data:/data
      - borg_cache:/home/borg/.cache/borg
      # Mount directories in docker you want to backup (REPLACE with your actual paths)
      # Replace with your directory path with source files. In this case i want to be able to backup all files from /opt
      - /opt:/local/data:rw
      # Additional directories for the backup repository - where i want the backup of the source files to be stored
      - /media/backup/borg-ui:/local/backupdir:rw
    environment:
      - TZ=Europe/Sofia  # Set your timezone
      - PUID=0
      - PGID=0

volumes:
  borg_data:
  borg_cache:
To save the changes, first exit Insert Mode by pressing ESC, then type :wq and confirm with Enter.
After the folder is created and the docker-compose.yml file is edited, the file structure should look like this:
/opt/docker/borg-ui
└── docker-compose.yml
Now lets create also the backup repository target folder structure /media/backup/borgui (if it does not exist already) that we set in the configuration file above
sudo mkdir /media/backup
sudo mkdir /media/backup/borg-ui
Now one final step executes all configurations, creates the Docker volumes used by Borg UI, downloads the required container image, and starts the application.
cd /opt/docker/borg-ui
sudo docker compose up -d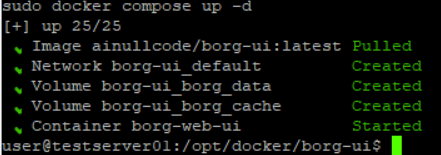
Verify that Borg UI is running
After the Docker image download completes and the application starts, there may be a short delay before the web interface becomes available.
You can verify that the service is listening on port 8081 using:
sudo netstat -ltn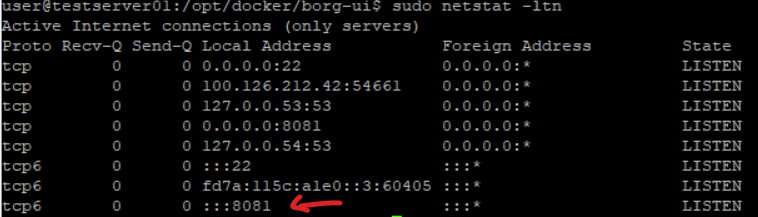
If you see port 8081 listening, you can open Borg UI in your web browser at http://localhost:8081 from the server itself or http://<machine-ip-address>:8081 from another device on your network (laptop, mobile). Check here how to view your ip address if you do not know it.
If you are running Borg UI inside a virtual machine, make sure the VM uses Bridged networking instead of NAT so other local devices can reach it.
The Borg UI login page should now appear and your installation is successful. Nicely done!
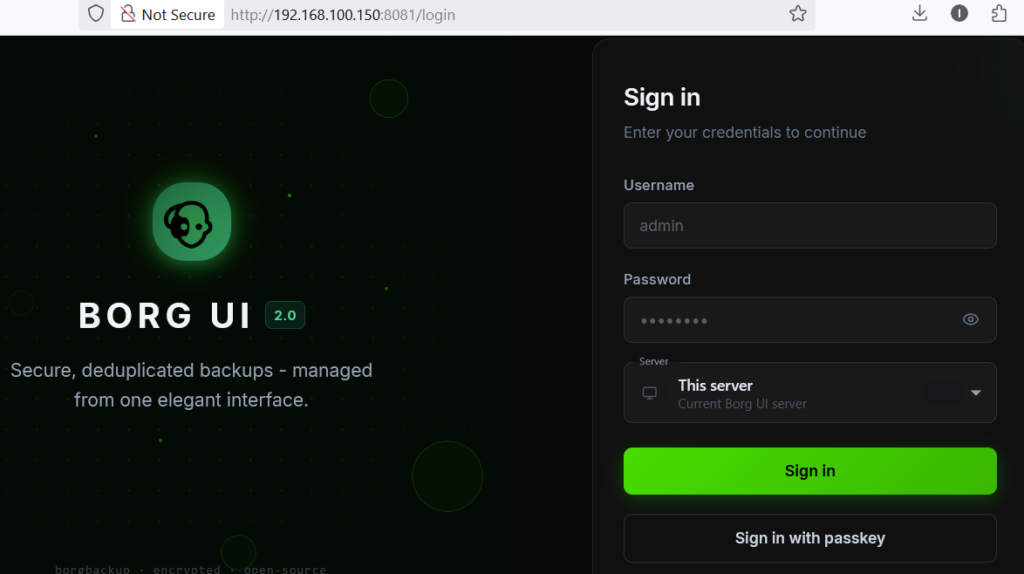
According to the official documentation states that the default credentials are:
Username: admin
Password: admin123
You should change these credentials immediately after your first login.
What can you do next?
Once logged in, Borg UI allows you to:
- Create local or remote Borg repositories.
- Configure backup jobs.
- Schedule daily automated backups.
- Browse backup archives.
- Restore files and folders.
- Monitor backup progress and history.
Daily incremental backups are one of the best ways to protect your data while minimising storage consumption. Because Borg Backup uses de-duplication, only changed data is stored between backup runs, making it extremely efficient for long-term file protection. Borg UI makes all of these advanced features accessible through an easy-to-use web interface.
I will guide you through creating repositories, configuring backup schedules, backing up files, and restoring data in the next article about How to use Borg UI.